
Ever wondered why gel manicures are all the rage? If you’ve ever tried a gel manicure, you know it’s different from a regular manicure in some pretty significant ways. Gel manicures offer a long-lasting, high-gloss finish that can outlast traditional nail polish by weeks. But before you dive into the world of gel, it’s important to understand the differences and benefits of both gel and regular manicures. In this post, we’ll explore why gel manicures might just become your new favorite beauty routine and how you can achieve stunning results right at home.
While regular manicures are great for a quick fix, gel manicures offer durability and shine that’s hard to beat. If you’re tired of chipping polish and frequent touch-ups, a gel manicure might be your answer. With the right tools and techniques, you can enjoy a salon-quality gel manicure without ever leaving your home. Let’s break down the differences and guide you through the process of giving yourself a fabulous gel manicure at home.
Gel Manicure vs. Regular Manicure
Longevity and Durability
Gel polish is known for its durability, lasting up to two weeks or even longer without chipping. In contrast, regular nail polish typically starts to chip within a few days. This means fewer touch-ups and longer-lasting beauty for your nails.
Shine and Finish
Gel manicures are renowned for their high-gloss finish that stays shiny and vibrant throughout the entire wear. Regular polish may look great initially, but it can lose its shine and become dull over time. Gel polish maintains its glossy finish thanks to the UV or LED light curing process, which helps the polish harden and stay shiny.
Application and Drying Time
Applying gel polish involves a bit more preparation and a curing process using a UV or LED lamp. While this might seem like a hassle, the result is a flawless, smudge-free manicure. Regular polish is easier to apply and doesn’t require special equipment, but it also means longer drying times and a higher risk of smudging if you’re not careful.
Removal Process
Removing gel polish requires a bit more effort compared to regular nail polish. You’ll need to soak the polish off with acetone and use a nail buffer to gently remove the gel. Regular nail polish can be removed quickly with nail polish remover, making it a more convenient option for those who prefer a low-maintenance routine.
The Best Products for At-Home Gel Manicure
JODSONE 60 PCS Gel Nail Polish Kit with UV Light
This all-in-one kit includes a variety of gel polish colors, a UV lamp, base and top coats, and essential tools. It’s perfect for achieving salon-quality gel nails at home.
Hateke Professional Nail Clipper Set
This set includes precision tools for trimming and shaping your nails. It’s an essential for preparing your nails before applying gel polish.
A nail file and buffer are crucial for shaping your nails and preparing them for polish. Use a buffer to smooth the nail surface before applying gel polish.
This effective cuticle remover helps soften and clean up your cuticles, making it easier to apply gel polish and achieve a smooth finish.
Soak-Off Gel Nail Polish Remover Kit
For removing gel polish, this kit includes everything you need to safely and effectively take off your gel polish without damaging your nails.
Nail Growth & Strengthener Oil
To keep your nails strong and promote healthy growth, consider using a nourishing nail growth oil like this one. This oil helps to strengthen your nails and prevent breakage, ensuring that your manicure looks great and lasts longer.
How to Give Yourself a Gel Manicure at Home
Ready to achieve a flawless gel manicure at home? Follow these steps for a professional-looking result, and don’t forget to use high-quality products to make the process smooth and enjoyable. Here’s a step-by-step guide to help you get started:
1. Prep Your Nails
Start by removing any old polish and trimming your nails to your desired length. Use a nail file and buffer to shape your nails and smooth the surface. A good buffer like the Teenitor Nail Buffer can help you achieve a perfectly smooth surface for the gel polish.
2. Cleanse and Dehydrate
Before applying any polish, it’s essential to cleanse and dehydrate your nails to remove any oils and residues. Use a nail dehydrator like the Modelones Nail Dehydrator and Primer to ensure that the gel polish adheres properly and lasts longer.
3. Apply a Base Coat
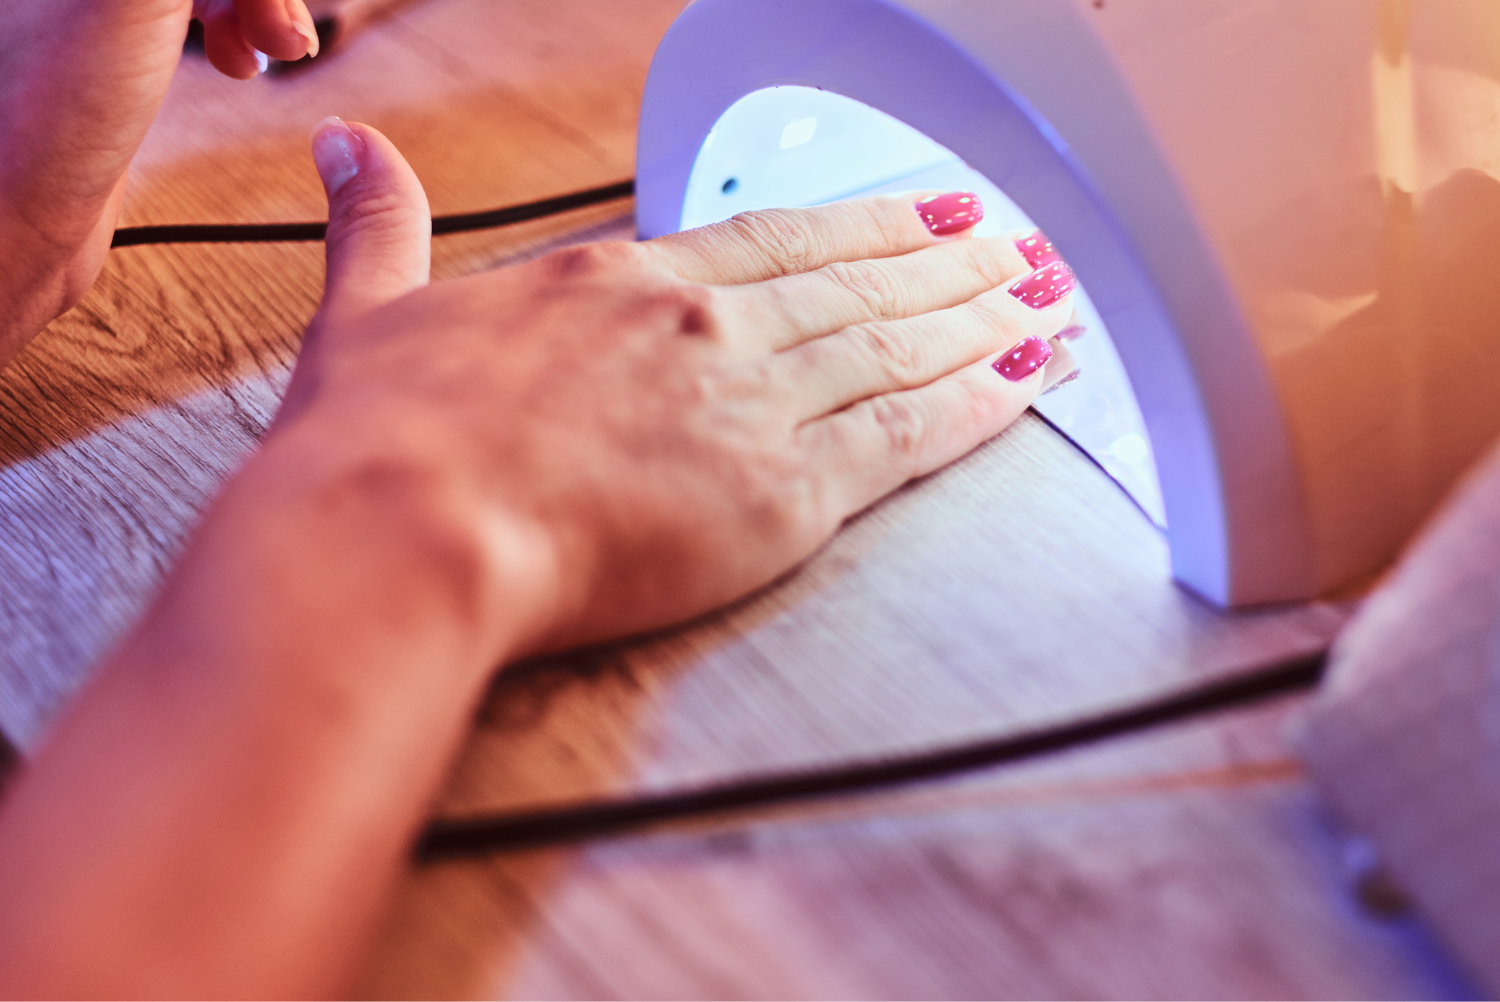
Apply a thin layer of gel base coat to each nail. Make sure to cover the entire nail, avoiding the cuticles and edges to prevent lifting. Cure the base coat under a UV or LED lamp, such as the JODSONE UV/LED Lamp, for the recommended time (usually 30-60 seconds).
4. Apply Gel Color
Next, apply a thin layer of gel color polish. Choose from a variety of shades in the JODSONE 60 PCS Gel Nail Polish Kit. Make sure to apply evenly and avoid getting polish on the cuticles. Cure the gel color under your UV/LED lamp. Repeat this step for a more opaque color if needed.
5. Apply a Top Coat
Seal your manicure with a gel top coat to add shine and durability. Apply a thin layer and cure it under the UV/LED lamp. A top coat like the one one in the JODSONE 60 PCS Gel Nail Polish Kit ensures your manicure stays glossy and chip-free.
6. Remove the Sticky Layer
After curing the top coat, your nails may have a sticky residue. Use a lint-free wipe soaked in rubbing alcohol or nail cleanser to remove this layer.
7. Nourish Your Nails
Finish your manicure by applying oil to keep your cuticles healthy and hydrated. Consider using a nourishing oil like Veenourish Nail Growth Oil to maintain the health of your nails and surrounding skin.
Final Thoughts
Doing your own gel manicure at home can be both cost-effective and satisfying. By following these steps and using the right products, you can achieve salon-quality results and enjoy beautiful, long-lasting nails. Experiment with different colors and designs to find what suits you best, and remember, the key to a great manicure is preparation and using high-quality products.
Related